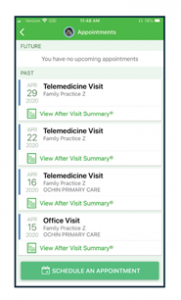
Telehealth Services

What is Telehealth?

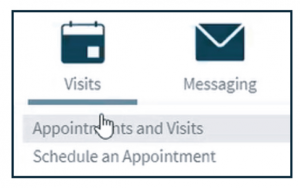
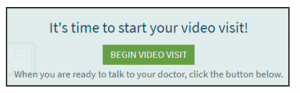
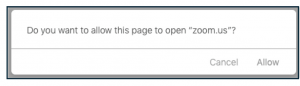
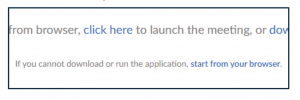
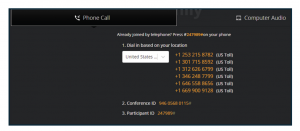
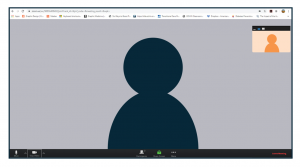
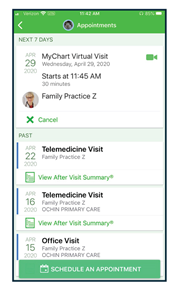
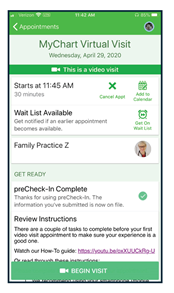
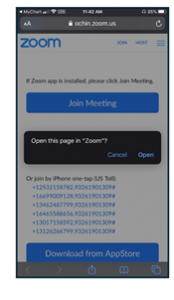
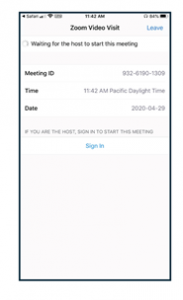
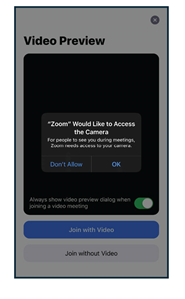
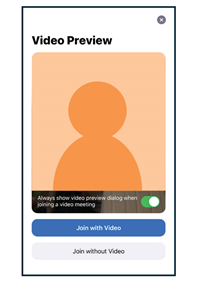
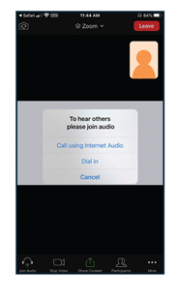
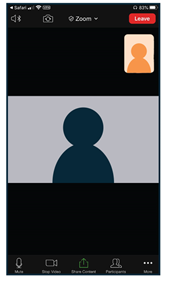
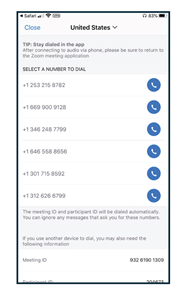
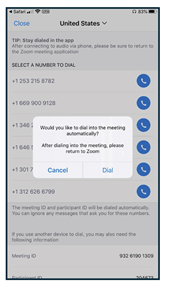
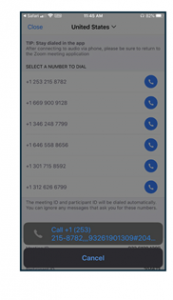
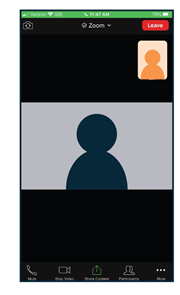
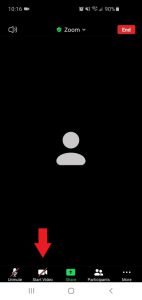
Telehealth also known as Virtual Visits, are a safe way to meet with your clinician or provider “face-to-face” without coming into the health center!   Telehealth visits can be done using Zoom on a smartphone, tablet or laptop and can be accessed through your My Chart account.

What do I need?

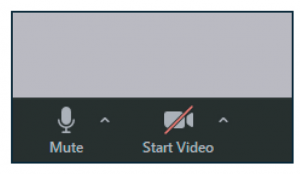
You will need a device with a camera and microphone, as well as Internet access. Smartphones, laptops, and tablets are all acceptable devices! Additionally, if using a smartphone, you will need to download the MyChart and Zoom apps directly from the app store.  Do you need a UCFS MyChart account? Please contact the health center and ask them to send you a link to get started — these can either be emailed to you or texted directly to your smartphone.

Get started now!

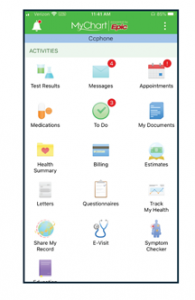
Download MyChart for your tablet or phone.


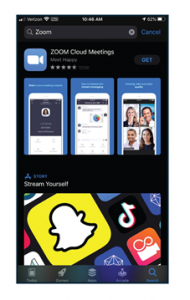
Download Zoom for your tablet or phone.


Guide to MyChart Virtual Visits

Getting Signed Up for MyChart

With a MyChart account you can view lab results, order medication refills and message your care team at your convenience. You can use MyChart Virtual Visits for video appointments with your provider from the comfort of your home.

  1. If you have not already received an activation code, you can request one from mychart.ochin.org/mychartucfs. Fill in the form and submit.
  2. To complete sign-up, your health center will give you an activation code or link by text, email or on your printed After Visit Summary.

Once you receive the link, follow these instructions:

  1. Click the unique link (this link expires in 60 days) to MyChart.
  2. Create a username, password and fill in your information.
  3. Success! You have created your MyChart account.
  4. You can now access MyChart from your personal computer or mobile device.

Joining Your Visit from a Desktop

You can participate in a virtual visit from a desktop computer with a camera and microphone and if your desktop doesn't have have a microphone, you can use a headset with a microphone or use your phone for audio. You can enter the visit at least 10 minutes early in Virtual Visits.

1.From Visits dropdown menu, click Appointments and Visits

2. You must preCheck-In before your appointment. Click preCheck-In up to three days before it starts. Update your personal information and sign documents if needed.

3. After preCheck-In is complete, click Begin Video Visit at least 10 minutes before the visit time.  (If the video drops, go back to the Begin Video Visit button.


4. Start here if joining with a downloaded Zoom application.

a. Zoom will launch. Prompts may vary by internet browser and computer system. Click allow to let the page open “zoom.us.”

b. You will be instructed to wait for the host (the provider)system.

4. Start here if joining  Zoom from your browser.

a. Zoom will launch. Prompts may vary by internet browser and computer system. Click start from your browser.

b. Click join. If this window does not appear, go back to MyChart and click begin Video Visit.

c. This screen will display until your provider begins the meeting.

5. Connecting to Audio and Video in the Visit

a. Once the provider joins, choose to connect with computer audio or by calling in. Computer audio will connect to your device’s speakers. This choice is recommended. To use your computer, click Join Audio by Computer. You are now in the visit.

b. To use your phone, click Phone Call.

  • Dial any one of the numbers listed from your phone.
  • When asked for the meeting ID, enter the conference ID listed followed by a hashtag (#).
  • Enter your participant ID followed by a hashtag.
  • You are now in the visit.

c. To use the camera on your device for video, click Start Video.

6. You and your provider can now see and hear each other.

7. When your visit is over, you will receive an After Visit Summary in MyChart.

Joining Your Visit from a Mobile Device or Tablet

You can participate in a virtual visit from your mobile device or tablet. You can enter the visit at least 10 minutes early in Virtual Visits.

*The following images were taken using an Apple iphone. Android devices may vary slightly.

1.Download the free Zoom app from the Apple App store or visit Google Play before your visit.

2. Tap Appointments from menu screen in MyChart Mobile.

3. You must preCheck-in to begin the visit. Tap preCheck-in. Verify or edit your personal information and sign documents if needed. Tap Submit.  You can preCheck-in up to three days before your appointment start time.

4. PreCheck-in is complete. Tap Close.

5. Tap your appointment again.

6. Tap Begin Visit.

7. Zoom will launch. Tap Open to open this page in “Zoom”.

8. You will be instructed to wait for the host (the provider).

Connecting to Audio and Video in the Visit

9. Connect to Video

a. First, tap OK to allow Zoom to use your device’s camera.

b. A preview of your video feed will show. Click Join with Video.

10. Connect to Audio 

Next, choose how you would like to connect to audio:

Internet Audio

a. If you are using Wi-Fi, choose Call using Internet Audio*. (*Internet audio is easiest and most secure.)

b. You and your provider can now see and hear each other.

Dial in Audio

a. If you need to dial into the visit, tap Dial in.

b. Tap any of the phone numbers provided.

c. Tap Dial.

d. Tap Call. You will be taken to the phone call. Your meeting ID is entered automatically. Stay on the line, and navigate back to your Zoom app.

e. You and your provider can now see and hear each other.

11. When your visit is over, you can access your After Visit Summary in MyChart.


Fixing Zoom Audio or Video

Having trouble with the audio or video? See below for some troubleshooting tips.

How to Turn on Zoom Video after Joining the Meeting


Once in the Zoom appointment, check the camera button at the bottom of your screen. If the camera has a red slash through it, tap the button to turn on your camera/video.

If your video still does not work, make sure that Zoom has access to your camera by checking the settings on your device.

-For Apple Devices, go to Settings > Camera > then scroll down the list of apps to find Zoom and click the bubble to turn it green

-For Android Devices, go to Settings > Apps >Zoom and scroll down to “Permissions” and make sure camera access is allowed.


How to Turn on Zoom Audio after Joining the Meeting


Once in the Zoom appointment, check the microphone button at the bottom of your screen. If the microphone has a red slash through it, tap the button to turn on your microphone/audio.

If your audio still does not work, make sure that Zoom has access to your microphone by checking the settings on your device.

-For Apple Devices, go to Settings > Microphone > then scroll down the list of apps to find Zoom and click the bubble to turn it green

-For Android Devices, go to Settings > Apps > Zoom and scroll down to “Permissions” and make sure microphone access is allowed.

Tips for a Successful Telehealth Visit

  1. Be ready for your visit – log into My Chart and connect to your virtual visit up to 10 minutes before your appointment time.  Have all information ready.
  2. Choose a quiet area of your home where you have privacy.
  3. Do not schedule appointments for when you will be driving, shopping, or working.
  4. Sit in one place and keep the camera still in front of you so the provider can see you and you can see your provider.
  5. This is your special time with your provider – please give the provider your undivided attention.  Do not answer other phone calls during your visit.
  6. If internet or phone call is disconnected, your provider will reach out to you to reconnect and continue the visit.  Keep your line free.
  7. Children must be present for their scheduled telehealth visits.